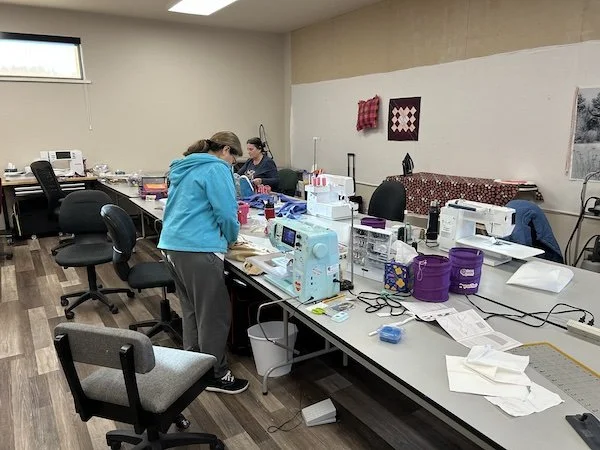
We had such fun in serger class yesterday. I had three students register ahead of time but one didn’t show. A fourth student registered just before class. The store had set up three sergers for me in the classroom. I wanted to do the class in a “round robin” format so that each machine could have a different stitch setting and decorative thread.
Each student owned a serger but had limited experience. I spent the first 30 minutes giving them a very condensed version of my serger mastery class. I have to remember to start out by defining what a looper is and what it does, because even people who own sergers aren’t necessarily familiar with the terminology.
After that, we made scrunchies, shoelaces, and socks. I provided all the material. The students worked well together and we had a lot of fun. I want people to laugh and enjoy themselves in my classes. All three left feeling more comfortable and confident about using their sergers.
I fielded the usual “Why don’t you have your classes on Saturday?” question. If I could have a month full of Saturdays for classes, I would, but I have to share Saturdays with other teachers and events.
******
I am going to be a grumpy old woman now. I suppose all generations do this. My first gripe has to do with the proper etiquette for requests. The husband works as a subcontratcor to many different general contractors in the county. The GCs are required to have a W-9 and a certificate of insurance on file for each of their subs. I can always tell when someone is getting audited by their insurance company because I will get a panicked e-mail asking for documentation.
I keep a scanned copy of the W-9 on the computer so I can send that whenever I get a request. The certificates of insurance have to come from our agent, and the agent requires that I provide a current mailing address for the company requesting the certificate. It’s very helpful if the company requesting the certificate puts that information in the signature line of their e-mail. If not, I sometimes can find it on the company website. Lately, however, the trend seems to be that websites only have a phone number and e-mail and no other contact info. I have had quite a few requests since the first of the year for certificates, but no contact info accompanies it. If you are going to request something from me—especially something that you need in a hurry to avoid getting dinged by your insurance company—don’t make extra work for me by making me hunt down your contact information. I am reminded of the Inigo Montoya Rule for Social Interaction (Princess Bride reference):
"I am Inigo Montoya, you killed my father, prepare to die!"
When communicating with real humans online it is an excellent best practice to do precisely what he does:
Introduce yourself without obfuscation or misdirection. (Hi, I am So-and-So General Contractor.)
Provide a relevant reason for the connection. (Tom does work for me and I need copies of his insurance documentation.)
State your business succinctly and allow them to respond. (Would you please send a certificate of insurance to this address?)
A lot of these guys text the husband to ask for this stuff, so he has been directed to get their contact information or have them e-mail it to me. I am an absolute pain in the ass of an administrative assistant, but our construction company runs like a well-oiled machine.
I run into something similar when asking people to be guests on the podcast. Trying to get some of these younger people to commit to a date and time is like pulling teeth. I’ll send three e-mails and if we haven’t scheduled a date by then, the request goes into the trash.
My other gripe is about the trend I am seeing for people who make one garment or quilt and decide to go into business as a designer. Literally, I saw one reference this morning to a new designer that started out with, “Designer X made a baby blanket last year and decided that sewing should be her full-time occupation!” I am all for people starting businesses from their hobbies because heaven knows I am guilty of that. However, it does everyone a disservice if you, Novice Designer, put out patterns that can’t be made from the instructions. Get yourself a competent pattern drafter and/or technical editor. Likewise, if you don’t understand proper garment construction techniques, don’t set yourself up to do alterations and repairs if you’re just going to make a hash of people’s clothing. I am still learning as I go, even at my age, but I also try to respect my limitations.
</rant over>
We need a photo for today’s post, so here you go. This is from January 2015. What a contrast to this year—we barely have enough snow to cover the grass.

