
Making the Tamarack Jacket
Developing new classes can be a time-consuming process. Most sewing and knitting instructors I know would much rather avoid it if possible. It’s why submitting class ideas to conferences can be such a trial when the conference organizers insist on having fully-developed class information for classes that might not be selected.
The store in Missoula wants a quilted jacket class. I’ve already made the one quilted jacket from the Riley Blake pattern that had so many problems. At my suggestion, we ditched that pattern and decided to use the Tamarack Jacket for the class. I had the Tamarack on my list to make, and the class isn’t until next fall, but I’m feeling the pressure to get the jacket made before all hell breaks loose with gardening season and my sewing time disappears. As it is, the house is a disaster area because I’ve been focused on this project.
This is a popular jacket. There are plenty of videos out there, including a series by Grainline Studio, the designer. The pattern is reasonably good, albeit thin on details. I’ve got notes written all over it for things I want to mention to students.
The pieces are cut first, then quilted. The upper size range has a bust dart—a narrow one, but a bust dart nonetheless. Cutting the pieces first, then quilting them, allows for the bust dart to be finished neatly on both the fronts and lining of the garment. (The batting has a dart in it, too.) Kate, the owner of The Confident Stitch in Missoula, made a video of her Tamarack Jacket in which she quilted her fabric first, then cut the pattern pieces. It meant that she waited to make her darts until the fabric was quilted, so the cut edges of the bust dart were visible on the inside of her jacket. Even so, I think that quilting the fabric before cutting the pattern is infinitely easier than the reverse. And quilting tends to shrink the pieces. That shrinkage may be built into the sizing, but I won’t know until I get the jacket done. I’m also not convinced the bust dart is going to contribute significantly to the fitting because it’s so narrow, but we’ll see when I get the jacket done.
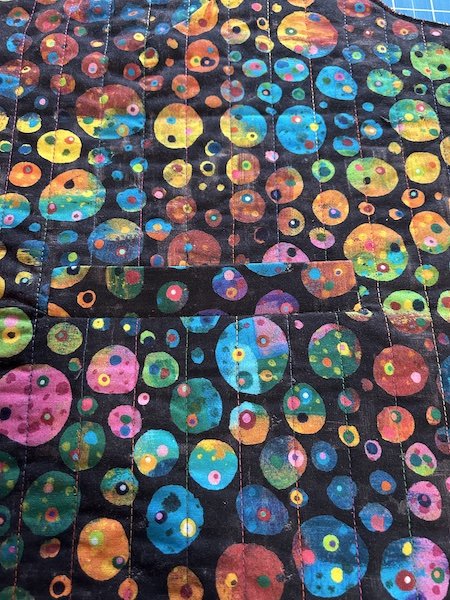
I am glad I watched the Grainline Studio video series, because one entire video was devoted to chalking out the quilting lines on the pieces with the bust darts. The bust darts distort the fabric, so in order to trick the eye into seeing straight lines, the quilting lines have to angle at the bust area. I decided to do straight line vertical quilting on my jacket, and if I hadn’t watched that video, I wouldn’t have known to do that. It’s not mentioned in the pattern. Having to make that adjustment also added another layer of complexity to the quilting process.
I decided to make the welt pockets. I’ve made similar zipper pockets in bags but wanted to see how these were handled in this jacket. They are worth the extra effort, but I am going to suggest to students that we stick to the patch pockets for their versions or we’ll be spending all of our class time making the welted pockets.
Probably the most frustrating thing about this pattern—and many others—is not being able to “see ahead” to know when certain techniques should be added. I had half of one of my welt pockets made before I realized that the pocket bag edges should be serged first. The pattern indicates that the pocket bag edges should be finished after the pocket is constructed but I saw no good way to do that; I wouldn’t have been able to get the edges under the serger foot. I also had to trim the batting out of the seam allowances, which was not mentioned in the pattern.
I am close to being finished. I only have to assemble the jacket, finish the front edges with bias binding, and add the snaps. I’d like to make a second one now that I’m aware of some of these refinements and how to incorporate them, but I simply don’t have time right now.
This was part of the process of making the welt pockets. Basting was recommended and definitely needed:

But the pocket did turn out well. The instructions are exceptionally clear and well illustrated:
This is one of those times of the year when I am juggling a thousand different things. I’m a slave to my calendar at the moment. And I’ll have to get out to the greenhouse next weekend and start getting things ready for planting, because that has to happen soon.
Little Roo is growing into his role as rooster-in-charge. He is very enthusiastic about herding the hens around. Dave was fairly laid back, so it’s funny to watch Little Roo get so excited. I’ll try to get some pictures of him soon.