Working With Challenging Fabrics
I’ve decided that dedicating a week to sewing Christmas gifts is the best strategy for me and one I will use in the future, although I will work harder at scheduling it earlier in the season. If I try to intersperse gift-making in between other projects, I get too distracted. I knocked out several items yesterday and I’m just about ready to get back to aprons and pattern development.
As it turned out, all of yesterday’s projects involved working with some very challenging fabrics. Thankfully, the requested items were not complicated. If I had had to deal with construction issues in addition to difficult fabrics, I might have given up sewing altogether.
I don’t have pictures of the actual items as they are all gifts, unfortunately. Project #1 was a pillow for DD#2 out of fake fur. This is to match the seat cover I put on her makeup table chair last year and she knows she is getting this, so I can talk about it. The fake fur was still in the stash. To make it “easier” on myself, I thought I would back the pillow with something plain and only have the fur on the front. I had a remnant of some fake suede and decided to use that for the back, making an envelope closure that required two simple hems.
Do not make the mistake of thinking that fake suede behaves like real suede. It doesn’t. Also, some kinds of fake suede are actually knit fabrics. Yes, you read that correctly. Check carefully before you begin sewing. If it’s a knit, a leather needle is going to be worse than useless. Use a ball point needle. (Zede and Mallory, at Sewhere.com, recommend a Microtex needle for some of the newer synthetic knits. Experiment.) However, even with a ball point needle and the even-feed foot on my Janome 6600P engaged, the fake suede was sticky enough that it didn’t want to feed easily.
My Necchi industrial machine has a Teflon foot and a Teflon needle plate, so I moved over to that machine. I don’t have ball point needles for that machine, but the material fed much more easily and the type of needle wasn’t really an issue. (As the husband says, sometimes you just need a bigger hammer.) If you don’t have a machine with a Teflon foot, you can also try sewing with a layer of tissue paper between the fabric and the feed dogs and/or putting a piece of tape on the bottom of the presser foot to make it slicker.
After I had hemmed the two pieces of backing material, I cut the fake fur to the appropriate size. The trick to cutting fake fur is to cut only through the backing—which is a knit—and not the pile. Use a pair of very sharp-tipped scissors. I went back to the Necchi industrial, increased the stitch length, and sewed the front to the backs. It worked best to have the fake suede on the bottom where it was feeding along the Teflon needle plate. I tried it on the top, first, and it stretched too much despite lightening the presser foot pressure.
The pillow turned out really well. I think if I were to do this project again, though, I would use a more stable fabric like linen or twill for the backing. Learn from me.
Project #2 featured some rayon challis. Sewing with rayon challis is like ice skating. The coefficient of friction of that fabric is zero. It wants to slide everywhere. I was using a remnant and had to piece two sections together—matching the print across the seam!—but rayon challis also frays like nobody’s business. Rather than make a French seam there, I serged the two pieces together. I’ve come up with a system for my serger threads: The needle threads are a neutral taupe-y gray color that is invisible on most fabrics. Those threads don’t change. I swap out the looper threads as needed so they match the color of the fabric. I’ve gotten good at tying on the new looper threads and running them through the machine, so changing looper colors only takes a minute or two.
I went back to the Janome for the remainder of the project, swapping out the ball point needle for a thinner Microtex needle. I had no issues with the sewing other than I had to sew slowly and keep a death grip on the material.
Project #3 was a minky pillowcase for my sister. (She knows she is getting one and even saw the material over Thanksgiving because I wanted to make sure it was the right color.) Minky is also a knit fabric. It will shed little bits all over the place when you cut it so keep a vacuum and a lint roller handy. I’ve got a fair bit of experience with minky, having made a number of baby blankets with it, and I know that sewing with the even-feed foot engaged, a longer stitch length, and a ball point or universal needle makes the process go much more smoothly.
[The default stitch length setting on my Janome is 2.2 (mm) which I find awfully short, even for piecing. When machine quilting, I bump it up to at least 3.0 or even 3.2, and for minky, I increase it all the way up to 4.0.]
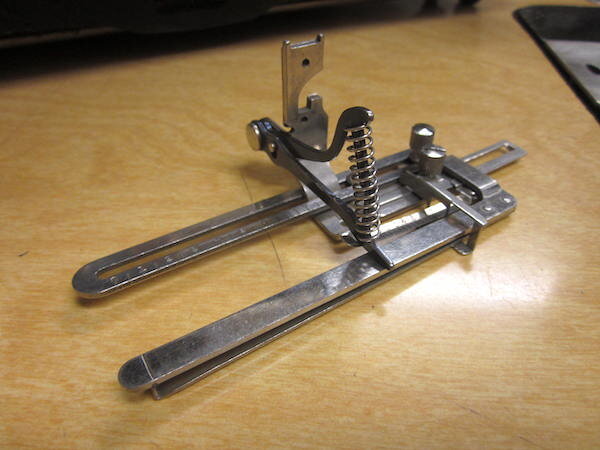
What did I learn from all of this? The right combination of equipment—machine, needles, thread—contributes hugely to the success of the project. As much as I love my vintage sewing machines, they don’t handle newer synthetic knit fabrics well at all. Vittorio, my Necchi BF, pitches a fit if I try to sew minky on him. Very few vintage machines have walking foot attachments, and while it’s possible to Rube Goldberg a walking foot to some of them, I’d rather just use a machine I don’t have to argue with.
If you’re contemplating a project using an unfamiliar fabric, it goes without saying that you should Google some background information. There is a wealth of it out there. Two of my favorite sites for tips on sewing with specific fabrics are ThreadsMagazine.com and Sew4Home.com.
********************************************************
I know some of you are only here for the manly shop content, so here is your update. The husband and his crew are going to be putting plywood on the ceiling in preparation for the insulation company to come and blow insulation up there. The scaffolding is in place:
I am going to go to town so that I won’t be here obsessing about people falling off scaffolding. That is not helpful.
I haven’t been inside the new shop since the doors went in and the lights were installed. That is one big-ass garage door:
This will be a lovely space for the husband to work in.


