Quilted Jacket Hell

All of this started because I thought the blue quilted fabric from Hobby Lobby would make a nice jacket . . .

The store in Missoula would like a quilted jacket class. They carry Riley Blake fabrics, so the owner asked me if I would consider teaching this pattern:

Sure, why not. I might decide that I like it enough to make it up with the Hobby Lobby fabric. And if I am going to teach this pattern, I need to make it up so that I can locate any possible landmines for the students ahead of time.

On the surface, it looks like an easy pattern—two fronts, two sleeves, a back, and a collar. Edges finished with binding. The pattern calls for three yards of quilted 44" wide fabric. I don’t have time to quilt three yards of fabric for a jacket right now, so I bought some solid pink pre-quilted fabric from Joanns. It’s not of the best quality, but it worked for testing.

[When I finally use that Hobby Lobby fabric, it will be in a pattern that has been thoroughly tested.]

The pattern pieces are printed in four different colors on one large piece of paper. The pattern pieces overlap, so they have to be traced. There are no grainlines or notches. I traced the pattern and cut the pieces Friday afternoon and started working on this yesterday morning. I thought it might take me 3-4 hours.

Riley Blake has a video about making this jacket on their YouTube channel. I watched a bit of it before I got started. The process looked reasonable, although I wondered why they hadn’t shown the actual sewing of the shoulder seams. Then I tried to sew my shoulder seams.

The fronts were 2" longer than the back at the shoulder seams. Had I cut the pieces incorrectly? I got out the pattern and measured the pattern pieces. The fronts are 2" longer than the back at the shoulder seams.

I adjusted the fronts by cutting back the angle of the V-neck opening so that the shoulder seams matched, then sewed them. One nice feature about this pattern is that all of the inside seams are bound. The jacket is reversible. I was a bit puzzled by the fact that the pattern calls for two different widths of binding. The 1-1/2" binding is to cover the (bulky) inside seams, while the 2" binding is for finishing the outside edges, which are not bulky. I forged on and followed the directions as written. (The directions, by the way, are skimpy and poorly illustrated.)

The 1-1/2" binding is folded in half lengthwise and pressed, making it 3/4" wide—or 6/8" for the math, as you’ll see in a moment. The seam allowances are 1/2" trimmed down to 3/8". After sewing the seam, the pattern instructions have you trim down the seam, then sew the binding along the seam. The pattern doesn’t specify that the raw edges of the seam and the binding should be aligned, although that was mentioned at one point in the video. After sewing the binding along the seam, the folded edge gets turned over the (very bulky) seam and topstitched down. It should look like this when it is done (oh how I love that #10 edgestitch foot):

Let’s do the math. The folded binding is 6/8" wide. It is sewn to a 3/8" seam with the raw edges aligned, meaning that 3/8" of the binding width becomes part of the seam, leaving only 3/8" to be folded over a very bulky seam—because the seam is two layers of quilted fabric!—and topstitched down.

I couldn’t make it happen. And I kept watching the video and thinking to myself that the binding they were sewing over the shoulder seam on their sample was wider than 3/8". From that point, in order to get that binding folded over and sewn down, I had to sew the binding on so that its raw edge was positioned below the raw edge of the seam by at least 1/8" and then trim the seam down even further.

This begs the question of why the narrower binding is specified in the pattern. It doesn’t work. The designer of the pattern is in the Riley Blake video and she says she prefers very tight binding, but this was ridiculous. I wonder if it’s a mistake in the pattern and the 1-1/2" binding was meant for the outer edge and the wider binding meant for the seams. The pattern clearly states to use the 1-1/2" binding for the seams, though.

It took me two hours to get those shoulder seams sorted out. I was able to get the sleeves attached and bound by lunchtime, although the instructions given in the pattern differ from the instructions that were given in the video. In the pattern, the binding is attached on the sleeve side of the seam and folded over to the body and stitched down. In the video, the instructions are to sew the binding to the body and fold it over to the sleeve side and stitch it down, which works much better.

And if I thought that trying to get that narrow binding folded over the shoulder seams was bad, trying to fold it over at the underarm on the side seam—where there are FOUR thicknesses of quilted fabric and two layers of sleeve seam binding—was next to impossible. I got a pair of very sharp, small scissors and trimmed that seam down to within an inch of its life.

Before I topstitched the side seam binding, I decided to attach the collar. The collar piece has to be bound on three sides with the wider binding. I did that, then began pinning the collar onto the jacket from the center back neck out.

The collar was an inch too long on either end, even after having cut back the angle of the V neck to get the shoulder seams to match. I went back to the pattern and measured. Yep, the collar pattern piece is longer than the measurement of the front Vs combined with the back neck.

Sigh. I did a bit more trimming to get the collar to attach to the body properly.

I was finishing up the topstitching on the side/body seam—which requires wrestling the jacket through the machine from one direction as far as possible, then turning it around and wrestling it through the machine from the other direction—when the husband came upstairs and asked me if I wanted to go out to dinner. I love that man.

All that is left now is to sew down the binding around the perimeter of the jacket and attach binding to the cuffs. I was hoping to have a photo of the completed jacket this morning, but it’s going to take another hour or two of work.

This pattern is currently unavailable on the Riley Blake website, although it says “coming soon.” I wonder if they had so many issues with sewists not being able to make the jacket as written that they are revising the pattern. The husband and I discussed this project on our way to dinner. He asked me why I hadn’t just ditched the pattern and made the jacket the way I thought it should go together. I said that if I am going to teach a pattern, I need to make it the way the designer specifies the first time, because the designer may have very good reasons for choosing certain techniques.

Believe me, I understand the work that goes into producing a quality pattern. Mistakes can creep in. On something this simple, though, many of these issues should have been caught in the testing stage. And I am a garment sewist. I suspect that a lot of the people who buy this pattern are quilters who don’t have a lot of garment-making experience. (That may be true of the designer, too.) This pattern is not a good introduction to garment sewing.

I still don’t know which pattern I’m going to use for that Hobby Lobby fabric. I have the Tamarack Jacket and the new McCall’s 8560 to test out. Neither of those patterns appears to have bound seams on the inside, at least from my initial reading. I don’t think it would be difficult to bind seams on either one, though, especially if I use binding of sufficient width. The bounds seams are a nice finishing detail.

We did go out to dinner, stopping by one of the jobsites on the way so the husband could check on a few things. This house is being built on the west shore of Flathead Lake. The views are stunning:

We couldn’t get a reservation at Mercantile Steak—our favorite date night restaurant—so we settled for Famous Dave’s, followed by a stop at Home Depot. The husband is going to put better lighting over my Juki 1541 in the garage so I can see what I am sewing.

A Tale of Two Tops

Stores where I teach like to have display samples. They prefer to have display samples in fabrics they carry so they can sell more fabric. I get that. As much as I can, I try to accommodate the stores. When it comes to clothing classes, I make the display samples in my size so I get some use of out them. (I am providing the fabric.) Also, I think it helps students to see clothing made for real people, not 98-pound models.

The quilt store here in Kalispell carries a fair bit of apparel fabric, including ponte, rayon batiks, and linen/rayon blends. The store in Missoula doesn’t carry any apparel fabric. Making their samples is a bit more challenging. They don’t require students to buy fabric for classes from them, but they want to encourage people to shop at stores other than Hobby Lobby, Walmart, and Joanns. If a student can’t find fabric at the quilt store, the quilt store will send them over to The Confident Stitch. I may specify in the supply list to bring muslin fabric. Sometimes we need to use less expensive fabrics to make the first iteration and refine the fit, because it is demoralizing for students to use expensive fabric on something they can’t wear.

For the Missoula store’s display sample, I chose the Fableism fabric. You’ll see from the photo that perhaps it isn’t technically an apparel fabric, but The Confident Stitch carries it and it did make a comfortable Cadence Top. Quilting cottons, lovely though they may be, don’t usually lend themselves well to garments, although some of the lawns and sateens work.

I wish I had a good way to get photos of me wearing these tops, because I think it would be more informative. The dress form will have to do.

I tested out a mashup of the upper bodice of the Cadence with the lower half of New Look 6543 and I think I have created the perfect woven tee pattern for me:

This is one of the rayon batiks that our store carries. You can see how much flowier it is than the Fableism fabric. I love the way this one fits and definitely prefer the French darts to horizontal bust darts. I also set in the sleeves in via the conventional method and they went in perfectly without the need for any ease stitches.

[I look at this top and I totally understand why I can’t wear store-bought tops—they are a good 6" or 8" too short, and this is far from tunic length on me. It hits about mid-hip.]

I see a batch of these tops in my future, although I am not yet ready for spring sewing. Social media is full of sewists starting to work on spring projects, and I’m going to be wearing sweater knits for at least another two months. I do have half a dozen chunks of rayon batiks in my stash, though, that will get made into more T’s and possibly a dress or two as warm weather approaches.

After I finished this top, I spent some time cleaning and organizing my sewing area. I need to stop procrastinating the pocket construction steps of that Place for Everything tote, so those have been stacked up next to the machine. And because seeing and comparing patterns is so helpful for cementing some of these fitting concepts into my brain, I traced the Amarena Dress (Liesl + Co). I have no intention of making it up right now, but I was able to compare the way it was drafted to the Cadence Top and the Scout Tee.

Honestly, I am a bit tired of making clothes. If I hadn’t had to get the shop sample done, I would have been working on quilts and bags.

********

The article about Joanns on the Craft Industry Alliance website disappeared for a bit yesterday. When it was reposted, the photo at the top of the article had been changed. The original photo was obviously an AI-generated image—an amateurish one, at that—and it was called out by several commenters. The photo was removed and replaced with a photo of the front of a Joanns store, along with a note that the Craft Industry Alliance was drafting a policy for use of artificial intelligence-generated images.

I get that AI is almost inevitable at this point, Luddite though I may be sometimes, I realize I can’t stem this tide. However, I wish we would not rush headlong into incorporating it thoughtlessly into every part of our lives. New! Shiny!—Oh, wait, you mean there are some drawbacks?

I’ve dabbled with ChatGPT a bit, but I always feel like I need a shower afterwards. I have zero faith in humanity, and I know AI will be used for nefarious purposes. I just wish we were smarter than that.

So Much Sewing Going On

Sorry, this post got rather long. It’s also a bit heavy on nerdy sewing concepts.

I spent Tuesday afternoon working on the Tim Holtz Correspondence quilt. This project jumped the line, in a sense, but I’m not going to chastise myself over it. I am working on what seems right to me in the moment. As much as I enjoy the challenge of a project like the Place for Everything Tote, sometimes I just want mindless sewing. Balance is key.

I chain pieced units on my beloved Necchi BF:

I haven’t sewn on this machine for a while and I didn’t want it to get lonely.

These are some of the partial blocks:

I still have to sew rectangle units onto the ends of these partial blocks. I like how this is coming together, though. The gray works better as a background than white or cream.

********

Hobby Lobby has not yet stocked the Spring pattern releases from McCall’s. I happened to stop in at Joanns while the manager was stocking patterns there, so I asked her if she had any new ones. The store had received a stock of KnowMe and Simplicity patterns but only a few McCall’s patterns. She said that she doesn’t think they will be getting any more pattern shipments until this bankruptcy issue is resolved.

This analysis of the entire Joanns debacle popped up on the Craft Industry Alliance website yesterday. I think it is spot on, particularly this assessment of the overall poor customer experience:

Imagine how different the experience at Joann would be as a customer if from the top-down the company was oriented to make the shopping experience pleasant instead of the “bad garage sale-like environment” of a Joann store.

That sums it up perfectly.

********

The quilt store in Missoula wants a woven top class. (Quilt stores are making an effort to fill the gap in apparel classes, at least locally.) I chose the Cadence Top from Love Notions for them. Love Notions has a teaching license system, which simplifies things for everyone. I spent yesterday sewing a Cadence for myself to make sure it will work for the class.

Personally, I’ve stayed away from Love Notions patterns only because they don’t seem to fit me well. I got out the Scout Tee pattern from a few weeks ago—the one I lengthened to fit me properly—and compared it to the Cadence pattern. I was surprised to see that my altered Scout Tee pattern pieces were very similar to the Cadence top pattern pieces. I took a leap of faith and traced the Cadence Top in my size, using the full bust option, with no alterations. I used some of the Fableism fabric I got at Pacific Fabrics last spring to make my version.

I am not unhappy with the way it turned out. I love the way the shoulders and upper bodice fit. I have broad shoulders, so that’s often a sticking point for me. The Scout Tee fits more tightly in the shoulder and underarm area. I also watched the TomKat Stitchery video about making the Cadence Top, and Whitney mentioned that she put the sleeves in flat on her version. How interesting. I always put my sleeves in flat in knit garments, but never in wovens. I decided to try that on this top. They went in without a hitch. That reinforces my belief that most sleeve caps are drafted with way too much ease. I’m not alone: Sleeve Cap Ease is Bogus.

The Cadence Top has a horizontal bust dart. It fits me well in that area, but I went down a rabbit hole and pulled out a top I made last year from New Look 6543. That top—also for wovens—has what is basically a French dart, which is a dart coming up from the side near the waist rather than a dart at the side of the bodice. I think I prefer the fit of the French dart. The waist area seems to be where I have problems with Love Notions patterns. Their block is drafted for someone who is 5'5", so even though the top might be long enough, the waist is in the wrong place for me.

I got the brilliant idea to frankenpattern the upper bodice of the Cadence Top with the French dart and lower half of New Look 6543. (It may not be so brilliant, but we won’t know until I try.) I think what I may end up with is basically the French Dart Shift in top form, but at least I know it will fit me well in all the important places. I’m going to test the pattern today, and you’ll get photos of both tops in a future blog post.

My Precious Tim Holtz Fabric

While I was stash diving for the lining fabric for my red Wool and Wax Tote last week, I was seduced by my Tim Holtz fabric into making a quilt. (Blame it all on the fabric.) I have four fat eighth bundles of the Correspondence line, which is exactly the amount I need to make a Fat Eighth Flapjack quilt.

Fat Eighth Flapjack is a free pattern from Fat Quarter Shop. The thing about Tim Holtz fabric is that many of the prints feature large-scale motifs, so cutting the fabric into tiny pieces defeats the purpose. When I use my Tim Holtz fabric, I try to find patterns that are mostly based on large-ish rectangles.

I paired these fabrics with some gray Kona from the stash for the 3" background squares. I cut the gray Kona on the Accuquilt cutter. The rest of the units have to be cut by hand, but it doesn’t take long.

*******

I am not sure what it is about zippers. I don’t think that zippers are particularly difficult—or at least I didn’t used to think so—but they seem to thwart me at every turn.

I bought some packages of byAnnie zipper tape-by-the yard for the Place for Everything Tote. I had some time yesterday morning before a Zoom meeting, so I thought I would attach the zipper pulls to the tape per the instructions. The zipper tape is a continuous length of several yards. The instructions have you mark the tape for to the appropriate lengths, after which you are supposed to attach the needed pulls, slide them to each marked section, sew stops between the sections, and cut the tape. The zipper for the outside of the case requires two pulls going in opposite directions. The remaining zippers require one pull.

I’ve put zipper pulls on zipper tape before. There is nothing mysterious or magical about it. I attempted to attach the pulls. They would not move down the tape. I tried the fork method. I watched the byAnnie videos to see if I was missing some crucial piece of information. No luck. Nothing. I struggled with those zipper pulls for almost an hour until I had to go to my meeting.

After the meeting, I tried again. I tried from each end of the tape. I could get the pull onto the tape, but it wouldn’t slide. Finally, I tried this method from Sallie Tomato, which involves cutting one side of the zipper tape shorter than the other to attach the pulls. That worked, although it still took some effort.

I spent way too much time on that part of the project yesterday. 😡

*******

I changed my podcasting schedule. I don’t like it. Producing it on this new schedule doesn’t flow well or fit into my life the way it used to. I may go back to the old schedule soon.

Barring any more zipper dysfunction, I’m hoping to knock out a few projects this week.

A Blip in Time

Saturday was a weird day. I knocked a bunch of stuff off my to-do list, but the day felt like it lasted forever. I remember looking at the clock at one point, thinking it must be past dinner time. It was 3 pm. 🧐

My ruler class samples are done. I may need to come up with some kind of deposit policy for the display items I give to stores to promote classes, because I have had a few instances of stores losing samples. I don’t think it’s anything nefarious; I think it’s a matter of being disorganized. However, I don’t want to have to make new promotional items for every class. The store here in town does an excellent job of collecting my samples and getting them back to me.

I sewed a line of stitches around the outside of all the Place For Everything pieces, which “seals” and flattens the edges to make them easier to sew. I am at an impasse, though, because I am overwhelmed by the pocket options for the inside pages. Vinyl or mesh? One large pocket or several smaller pockets? Or half large pockets and a few smaller pockets? I don’t know what I will want or need, so I don’t know what to make. I am leaning toward larger vinyl pockets. I cut two pieces of vinyl. Baby steps.

Angela Walters has a new video series on quilting swirls, so after I finished with the class samples and PFE pieces, I felt compelled to mess around with free-motion swirl quilting on the Q20.

So relaxing. I did a bit more of this yesterday afternoon. Free motion quilting is a bit like learning to play the piano. Theory is all well and good, but you can’t learn it without doing it, because so much of it depends on forming the muscle memory.

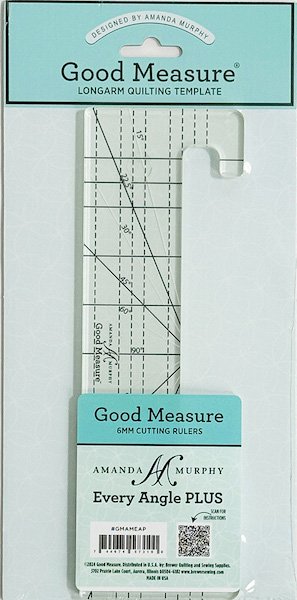
Amanda Murphy has come out with some new quilting rulers. I ordered the Every Angle Plus, which has “hooks” on each end to make ditch quilting easier.

I really wish Bernina would come out with some kind of stitch-in-the-ditch foot for the Q-series machines.

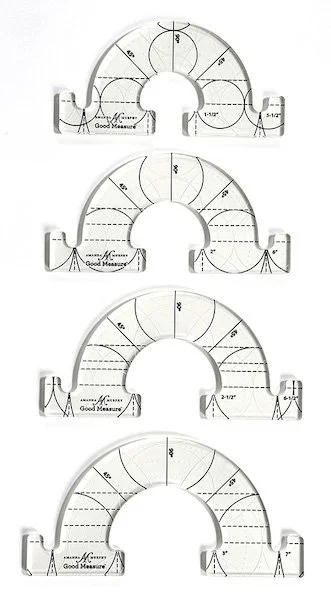
I also ordered the Every Semicircle set:

I have a semicircle set from HandiQuilter, but those rulers are hard to keep lined up on the quilting. That’s why I really like Amanda Murphy’s rulers. The hooks help keep the quilting foot where it belongs at all times.

*********

I have a week of empty spaces on my calendar. (I am whispering so the universe doesn’t hear me.) That seems like such a luxury to me. I intend to take advantage of it.

I Love January

Many people complain that January feels like it lasts forever, but it is one of my favorite months. The holidays have come and gone, the new year begins with a clean slate, and I have an abundance of sewing time. Also, the husband is here being a Shiny Toy and that’s always fun. (I am not being facetious.)

DD#1 called us to chat last night. Our SIL is the dentist at the Coast Guard station in Ketchikan, Alaska. He was promoted to Lieutenant Commander in a ceremony at the base yesterday. We are so proud of our kids. 😊

I had enough quilted material left from cutting the pieces for the A Place for Everything Tote that I was able to cut the pieces for another byAnnie pattern, Running With Scissors:

Function stacking for the win.

I worked on more class samples yesterday. This is another cheater print:

It looks complicated, but it’s actually very simple to quilt. I started with the small pink square in the center, and then it was just a matter of quilting ever-larger squares around it.

Just when I had decided that I would make the Tamarack jacket with that blue quilted fabric, McCall’s released its spring line of patterns and I spotted this one:

What to do? I think I like this one better. I’ll pop into Hobby Lobby next week to see if they have the pattern in stock. Joanns has been taking forever to stock new patterns, so it may be October by the time they get this one, if they are even in business by then.

Riley Blake is carrying this pattern by Paula McKinlay, but it’s “one size fits all,” which I interpret as “one size fits no one.”

I just don’t see how one size could fit both a petite 5'2" woman and a larger 5'9" woman. I do like the style, though, with the cuffs and collar.

January Road Trip

I have had way too many people-to-people interactions in the past week. I also have been feeling the need for a road trip. I can go about 6-8 weeks before I start to get twitchy, and it’s been almost two months since my Thanksgiving trip to Seattle. Unfortunately, I can’t go as far in the winter, so I contented myself with a trip to Missoula and enjoyed some quiet time alone in my head.

It was foggy when I left; some people, especially transplants to Montana, do not understand the dangers of freezing fog, but if I had waited until the fog burned off, I wouldn’t have gotten to Missoula until lunchtime. The drive was uneventful, and by the time I arrived, it was another brilliantly sunny day.

Missoula doesn’t have much snow.

My first stop was the quilt store where I’ve taught in the past. I met with the owners and we got a slate of classes on the calendar for this spring. We’re trying not to overlap classes with the store here in Kalispell even though the stores are two hours apart. I think we came up with some good ones. Hopefully the customers will think so, too, and sign up for them.

I also purchased the rest of the supplies I need for the byAnnie Place for Everything Tote bag. I’ll be able to continue working on that project now.

Missoula’s Walmart did not have much on its remnant rack, so I continued on to Joann Fabrics. When Robin and I were there last spring, I saw that they had some very cute printed terrycloth fabric for sale. I was going to make myself a robe, but I would have needed something like seven yards of 44” wide fabric and it was $20 a yard. I will spend money on many things, but not $150 on fabric to make myself a robe. For silk, maybe, but not terrycloth.

Two bolts of that fabric were on the “last chance” shelf at 70% off, so I bought what they had. Now I can make myself a robe.

I said to the husband that I realize that I am not helping Joann Fabrics to stay in business, but their problems are much larger than $20 a yard terrycloth.

After Joanns, I headed to The Confident Stitch. I could have bought fabric—I can always find fabric there—but I confined my purchases to a few patterns, which happened to be 50% off. I bought the Amarena Dress from Liesl + Co:

Do you remember the blue quilted fabric I bought at Hobby Lobby last fall? That fabric still hasn’t been turned into a jacket and it’s driving me nuts. Some projects make themselves. That project is not one of them. I think I am going to use it to make a Tamarack jacket that I can wear this spring.

Of course, I stopped at the Amish store on my way home. I skipped the ice cream, but bought socks for the husband and me. He needs more boot socks for work. I like to wear knee socks in the winter and have become quite fond of the ones that most Amish stores sell.

My last stop was at a small quilt store in Ronan, about halfway between here and Missoula. Robin and I discovered this store a few years ago. It is currently in a tiny, tiny space that it outgrew almost as soon as it opened. When I walked in, I heard the employee at the cutting table telling a customer that the store is moving across the road to a much larger space. Yay!

I had a quiet evening at home by myself because the husband was doing his annual CPR training for the fire department.

Paperwork, sewing, and cooking are on the schedule for the next two days. I made and sent a batch of cookies to the husband’s father two weeks ago, but apparently my BIL ate all the chocolate chip cookies before my FIL could have any. Bad BIL. I need to make and send another batch.

The Future of Fabric at Joanns

Joann Fabrics needs a miracle. I don’t think the company is going to survive. I was looking at the Customer FAQ on the restructuring page of Joann’s website, and this bullet point leaped out:

Gordon Brothers has indicated that it intends to pursue a liquidation of the Company and conduct going-out-of-business sales at all store locations.

Gordon Brothers is currently the only interested buyer, in what is referred to as the “stalking horse” position. Other, better offers are being pursued, but it appears that Gordon Brothers is the buyer of last (only?) resort. Note that the sale to Gordon Brothers has not been completed.

We shall see what happens. I will be a bit sad not to have Joann Fabrics as a resource, although one could argue that they haven’t been a good resource for several years because they just don’t carry anything worth buying anymore.

In an unrelated-but-also-interesting twist, I tried to order two lengths of Minerva Exclusive Crushed Velvet a week ago. This is the fabric from which I made my Christmas dress, and I thought to use it again for my 2025 dress. I believe that Minerva prints a lot of their fabrics on demand, which is what allows them to offer such a huge selection. I received an e-mail from them yesterday letting me know that the mill does not know when they will be able to fulfill this order and how did I want to proceed? I opted to cancel the order. Is the mill overwhelmed with orders? Is something else going on? Inquiring minds and all that.

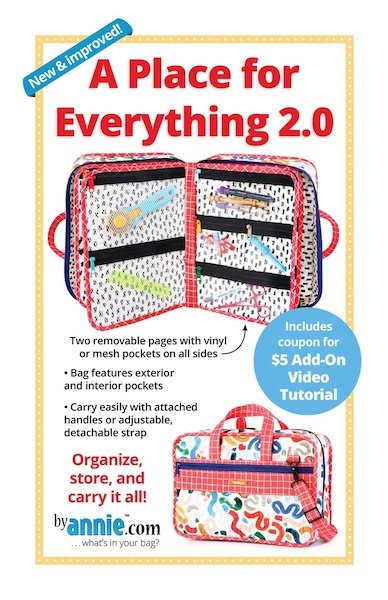
I started a project yesterday that has been languishing in the queue for almost a year. I want to make a byAnnie A Place for Everything Tote:

I want something to hold all of my supplies when I travel. Yesterday afternoon, I sandwiched and quilted the fabric for the body of the case. The correct color thread was already in the Q20 and it seemed like a good time to get this done.

Unfortunately, I need a few more supplies to proceed. This project requires an insane number of zippers, and rather than cut down pre-made zippers, I want to use zipper tape. I don’t think anyone in Kalispell carries the byAnnie zipper tape, at least not in all the colors.

After that quilting was done, I used the same color thread to make another class sample for the ruler class. Sometimes quilters learn better with training wheels. Rather than trying to quilt a design from scratch, it helps to practice quilting around a printed design. Quilters call these “cheater prints.”

This fabric is from one of the Laundry Basket Quilts lines.

Yesterday was a brilliantly sunny day. I took this photo when I went out to get the mail. The mountains have on their winter finery. This view is looking south down our road.

As I was standing at the mailbox, a truck came around the corner at the north edge of our property. After that corner, you can see that there is quite a long straight stretch. A red Mustang came screaming out from behind the truck, which apparently wasn’t going fast enough for the driver of the Mustang. I jumped back into the snowbank to get off the road. The Mustang sped past me and I watched it fishtail down the icy road. I doubt the car had snow tires or any extra weight in the back end.

The neighboring fire district line is about two miles down the road. When the husband sees this kind of stuff, he always says that he hopes the driver waits to wreck the car until they are in Bigfork’s district.

Quilting and Teenage Roosters

I finished the black corduroy skirt and wore it to church on Sunday. I like the slightly shorter length. I may move the zipper to the back seam rather than the side seam on the next iteration. I don’t think side zippers work well with my high hip curves.

I have had a slew of meetings over the past couple of days. I have also been reminded lately how easy it is for people who aren’t doing anything to criticize the efforts of those who are. Do you ever wonder why people are reluctant to take leadership roles in your church or community? It’s because they often feel like they are under constant attack for the decisions they make in situations that no one else is brave (or stupid) enough to shoulder. I really appreciate the people at church who come up to me and say, “Hey, I know this is a hard job—I am praying for you.” It seems like such a little thing but it means a lot.

One of my meetings went really well and I am looking forward to the work that comes out of it. That meeting also gave me the chance to reconnect with someone I haven’t seen in about 10 years.

My thread class that was scheduled for yesterday afternoon was canceled due to lack of students. I wasn’t too busted up about that. Not having to teach freed up some valuable time for other tasks, but it is frustrating for both the store and the teacher when classes don’t fill. If the store stopped offering classes, though, customers would complain.

Complaining, criticizing, and fault-finding seem to be the default setting of most human beings.

Joann Fabrics has filed bankruptcy again (Chapter 11). I know of at least three stores in the US that are closing. Every time I drive by ours, I expect to see a big “Store Closing” banner hung across the front.

I’ve hired someone to help me with social media for the podcast. So far, so good. I knew what needed to be done, but I got mired in the muck on my way there. Have I mentioned how much I hate Instagram? I am sure things will evolve as we go along, but at least it’s a step in a forward direction.

I spent yesterday afternoon working on a class sample for my ruler quilting class in two weeks. (That one has students enrolled, because I talked to one of them the other day.)

This is a series of four classes on quilting with rulers. We’re starting with the straight ruler, so I made up a sample showing what kinds of quilting designs can be made with simple straight lines.

I adore 60-degree diamonds:

Clean and unfussy.

The sampler shows examples for overall quilting, small blocks, and borders:

Little Roo found his voice and spends an inordinate amount of time every day practicing crowing. He sounds like a rusty gate. Also, having hit puberty, he has started chasing hens around the chicken coop, which annoys both the hens and Dave. I’ve seen Dave go after Little Roo a couple of times. Dave is about twice his size, so I am hoping this doesn’t end in bloodshed. 🫰🏻

How to Grow Lettuce in the Basement

One of my aunts (hi Auntie Omi) asked about the lettuce-growing setup. I’ll run through it in case anyone else wants to know how we do it.

We bought this a few years ago:

It’s a frame with three shelves and three lights. The lights are adjustable using chains. If you don’t need the shelving but want lights, the Barrina lights are what most people use. (Ignore those totes—that was a different project.)

I start the lettuce seeds in these Rapid Rooter plugs, which I get from Amazon.

These are not the same as little peat pots. I tried starting seedlings in these and putting them directly into the ground in the garden and that did not work very well. These are meant for hydroponic systems.

I’ve found it works best to pack the rooting plugs into a casserole dish, allow them to soak up water from the bottom, then plant the seeds in the holes. Once the seeds have sprouted, I move the plugs to half-pint mason jars. The jars have rings on them but no lids. A plastic “net pot” sits in the jar and is supported by the rings:

Net pots come in different sizes (also from Amazon). The ones I use are 2".

This is what the seedlings look like when they are growing in the mason jars:

And eventually, we get this:

At that point, the lettuce plants will produce for 6-8 weeks. I keep them watered and just cut off the new growth for our salads.

Time to Grow Lettuce

I restarted the lettuce-growing operation in the basement. The seeds are beginning to sprout in the rooting plugs:

Once they’ve all sprouted, I’ll transfer the rooting plugs to individual mason jars under the grow lights, and in a couple of weeks, we should be having fresh salads for dinner every night.

It is about time for me to start thinking about putting in a seed order. I am going to order from MIGardener. I just haven’t had good luck with Victory Seeds since they moved from Oregon to Texas, and MIGardener comes highly recommended by Sarah.

We’ve already decided not to do pigs again this year.

The husband and I were at the fire department dinner Thursday night when he got a text from one of our employees who lives down the road from us. Apparently, his family had a grizzly bear in their yard that evening. I saw the photos. A couple of weeks ago, another neighbor posted pictures of grizzly tracks in the snow (verified by Fish, Wildlife, and Parks).

It is wild to me that we’re in the second week of January and at least one bear hasn’t denned up yet. It might have to build an igloo now.

I spent yesterday morning working on my punch list and got most of it handled. “Punch list” is a building term that refers to all of the minor tasks that need to be taken care of, usually toward the end of a project. Some of the items on my list only required a phone call. Some involved updating a couple of websites. If I don’t corral and deal with those little tasks, though, they tend to fall through the cracks.

After lunch, I cut out a black corduroy Ramona skirt. That will be today’s project, once I finish the remaining items on the punch list.

*******

I’ve decided to change the podcast production schedule starting this month. I am going to release an episode every other week. On the in-between weeks, I am sending a newsletter to my mailing list. If you want to get on the mailing list, go to the podcast website and scroll down to the bottom of that home page to sign up.

The newsletter will feature additional information about the current episode, a teaser for future episodes, and photos of my current sewing projects. It will be similar to the blog, but I won’t include any photos of lettuce seedlings or roosters.

One of the classes I am teaching at Sew Expo is on knitting pattern publishing. I’ve been thinking a lot about the changes I’ve seen since I published my finishing book in 1996. Back then, desktop publishing was in its infancy. Now, anyone with a computer is able to publish anything in virtually any format. What a revolution.

One More Tote

We are deep in hibernation mode here. The husband was home again yesterday. I think it’s good for him to have some down time. The only problem is that I am tempted to spend the day talking to him instead of working. Thankfully, he has stuff to do out in his shop.

I made another Wool and Wax Tote yesterday:

I think I am done with totes now. I’ve scratched that itch. I am very pleased with the way this one turned out. A piece of precious Tim Holtz fabric was used for the lining:

I should not have opened up my bin of Tim Holtz fabric, though, because now I want to make a quilt with some of it. 😮

I need to find out where our store sourced this brown waxed canvas and if they can get additional colors. It’s lighter than the AL Frances Textiles canvas and has a nice finish. Making the bag start to finish yesterday gave me a good idea about how long the class should take.

I still have to put handles on the blue plaid version. Joanns didn’t have gray leather. I think Hobby Lobby has some and I’ll check there today. The first bag I made had cotton webbing handles that were sewn into the bag. I prefer the leather handles.

Speaking of Joanns, I have heard of a few store closings around the country. I hope ours is able to stay open. I won’t be surprised if it closes, although I don’t know where people will get fleece and flannel, because that seems to be mostly what our store sells.

I think that I am going to move on to making a couple of corduroy Ramona skirts. I want to be able to wear me-made tops and bottoms when I teach at Sew Expo and I do like the way that skirt fits.

Today is a very busy day. I have a podcast interview this morning, a lunch meeting in town, a chicken feed/Costco run after that, and our fire department trustees are hosting their annual member appreciation dinner for the firefighters and their spouses tonight.

Over Here in Bagland

It seems that the theme—for the first month of 2025, at least—is bags. I assembled the outside of the plaid Wool and Wax Tote yesterday morning:

I’ll make the lining today and attach the handles and it will be done.

I was working on this around 10 am yesterday when I got a call from the quilt store:

“Janet, you have a class today?”

“Yes, with one student.”

“She’s here waiting for you.”

After a bit of discussion, we determined that when she signed up for the class, she was told it started at 10 am. The website indicated the class started at 1 pm. It was a simple mixup in communication. Things have been a bit crazy at the store for the past few weeks because they implemented a new point-of-sale system over the holidays and are still working out the bugs.

I looked at the clock and saw that it was 10:12 am. I said, “Give me a few minutes to brush my teeth and throw all the class supplies in the car and I can be there by 11.” The student said she was willing to wait, so that’s what I did. I walked into the store at 10:59.

We had a wonderful class together. Her husband purchased the serger for her as a Christmas present and she was motivated to learn how to use it. I think she will do just fine. She had already read through part of the book that comes with the machine.

The two of us had a good laugh because I was telling her about my upcoming Wool and Wax Tote class and she said that her husband was researching industrial sewing machines. Apparently, he has been asking her to make generator covers. I told her I got the Juki 1541 for the same reason.

While I was the store, I got supplies for one more Wool and Wax Tote:

The red is a chunk of lovely herringbone-patterned wool and the brown is the waxed canvas the store currently carries. I wanted to make a class sample using store materials because the tote they currently have on display is made from waxed canvas I purchased a couple of years ago from AL Frances Textiles on Etsy.

A Wool Plaid Wool and Wax Tote

I went stash diving Sunday afternoon and it was just like shopping in my own personal fabric store. I need a quick win or two after that collar debacle. I pulled out some bright green brushed hacci knit that is going to become another Simplicity 9385.

I also found another length of striped ponte knit. The first one I used was a dark navy stripe, but the second one is a black stripe. I only have enough for a top. I think I may revise the Simplicity 9328 pattern by removing the bust darts and incorporating my collar idea. I have plenty of black ponte that I can use for collar and cuffs.

I understand the need to make compromises in design/construction choices, especially in commercial settings. I also think there is a certain amount of laziness inherent in the design departments of some of the large pattern companies. Indie designers, in my opinion, do a much better job with the sorts of design details that really make or break a pattern, and understanding how knit fabric behaves differently from woven fabric—and how it needs to be handled because of that difference—is one of those details.

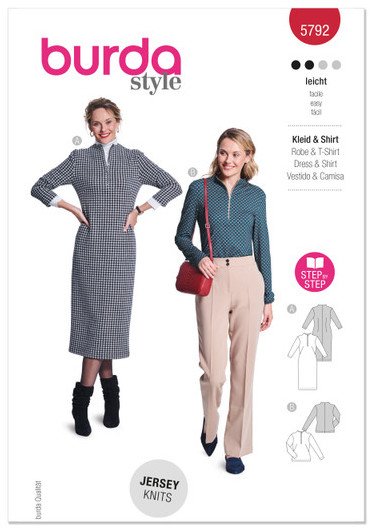
The Burda pattern with the collarless zip probably won’t make it into the queue any time soon. I looked at the instructions. They aren’t difficult, but they are different than the Simplicity instructions and I don’t feel like going up another learning curve right now.

I pulled out the leftover gray waxed canvas and the leftover blue-and-gray plaid wool from my coat project and started working on a Wool and Wax Tote:

That print is the lining fabric. I got as far as making and attaching the front pocket. (I love my rivet press.) The rest of the assembly is fairly straightforward. I’ll sew the front and back pieces to the base, sew the side seams and box the corners, make and attach the lining, then attach the handles. If I can find some gray leather to match, I’ll make the handles out of that; otherwise, I’ll use black handles and rivet them onto the bag.

While I have this plaid fabric out, I am going to make some pockets for my coat. Karina at Lifting Pins and Needles has an excellent video about making patch pockets for a plaid coat. She cut hers on the bias, and I will make mine the same way.

*******

The husband took pictures of the basement door-cutting project for me. They poured these concrete columns on the sides to encase the rock edges and to provide a stable base for framing the doorway:

Framing will happen this week.

*******

January is fast becoming the month of meetings. I hate meetings. So much could be done via e-mail, leaving the in-person gatherings for the most crucial parts of planning, but some people just like to get together and schmooze. Ugh.

The past few (quiet) weeks have made me realize how much I appreciate peace and calm. I am at the point in my life where I love peace so much and hate drama so much that if someone feels the need to disturb my peace with their drama—or criticism or negativity—I simply won’t engage with them. The husband and I have created this little oasis of sanity here and I am loath to allow anything to disrupt it.

Form Not Following Function

Just before I started working on the Kanoko Tote, I took a chunk of lighter-weight ponte out of the stash. It was sitting on the table next to the Simplicity 9328 pattern, which gave me the idea to use it for a wearable muslin. The ponte was a Walmart remnant that was something like $8 for four yards, and interlock knits were one of the fabrics specified on the pattern envelope.

[Our Walmart has been very thin on remnants for some reason. Either I am not getting there on days it has been restocked, or they stopped ordering for it. Oh, well. At least I am not being tempted to add to the stash.]

Simplicity 9328 is a quarter-zip top/dress pattern:

In keeping with my habit of making the pattern as written, the only changes I made were to adjust the position of the bust darts slightly. I don’t think I even lengthened this one as it looked good next to my bodice sloper.

And because I haven’t yet been punished enough by zippers, of course I chose another pattern with a zipper insertion—into a knit fabric, no less. I followed the directions to the letter. Next time I won’t. The zipper went in easily, all things considered. I used my dual-feed zipper foot, which kept the stripes from going wonky around the zipper placket. For some reason—more on this in a moment—the pattern instructs you to sew a length of grosgrain ribbon over the zipper edges on the wrong side after the zipper is inserted. I see no reason to do that in future iterations. All that accomplished was to add bulk to the neckline area which became a problem when attaching the collar. Looking at the reviews for this pattern on the Sewing Pattern Review website, I see that other people came to the same conclusion.

And that collar . . . sigh. I want to make this again, but I am going to do the collar differently. The instructions had me sew the interfaced collar facing onto the body, leaving 5/8" of the collar extending past the edge of the body. Then I had to sew the collar onto the collar facing. The bottom edge of the collar was folded in and pressed by 5/8". After the collar was sewn onto the collar facing, it was turned inside out and that folded edge stitched down to cover the raw seams.

Here’s today’s sermon for you: A long time ago, when sergers were less common and more expensive, many sewists made their knit garments using sewing machines. (Hello, Stretch & Sew.) However, it is now 2025, not 1986. A decent-quality serger can be had these days for a couple hundred dollars, and if you’re like me and scour thrift stores, you might even pick up a BabyLock serger for $13.99. However, most sewing patterns are still being written as though sergers don’t exist. This pattern could have been improved dramatically by the addition of a few notes about where a serger would be a better choice than a sewing machine for some techniques. In addition, this pattern read as though it had been written for a woven garment. The sleeve instructions were similar to those for a woven garment, even though it is far easier and quicker to sew sleeves in flat on knit garments. And I am not entirely convinced that this design needs bust darts.

This is what ended up happening at that collar area: There was so much bulk at that front corner—thanks to the redundant grosgrain ribbon, the zipper tape, and four layers of (graded) collar seams—that nothing would lie nicely. I finally ran the seam that attached the collar facing to the body through the serger, which flattened and neatened that seam enough that I was able to topstitch down the collar. I am not happy with the collar, though. Next time, I am going to assemble the collar separately (on the serger) and attach it to the body with the serger, foregoing the instructions to fold up that bottom collar edge and sew it down to cover the raw edge. That means I will have a serger edge there, yes, but I think the entire collar will look better. If I were so inclined, I could sew knit binding over the serger seam to cover it. I looked at a few other quarter-zip tops in my wardrobe and that is how they are constructed.

The striped fabric probably wasn’t the best choice. The bust darts look a little weird when the dress is on me, even though they are perfectly positioned and sewn. I should have done the collar in a solid color. And I ended up cutting the sleeves too short (don’t ask), so I had to add cuffs to make them the correct length. Solid-color cuffs would have tied in nicely with a solid-color collar.

It’s done. I learned a lot. I would make this again but with some changes. I’ve also got this Burda pattern:

This pattern is collarless and has French darts. I am going to read through those instructions today to see how they treat that zipper insertion.

I keep telling myself that none of this is a waste of time, even if I end up with something less than perfect. It’s all a learning process. This is why sewists make muslins.

I am not sure what will be up next on the cutting table. I might take a day or two away from sewing and allow the recent makes to percolate through my brain.

Concrete in Winter

People always ask me if the husband’s work slows down in the winter. The answer is that it depends. It depends on the weather, of course—if we get a lot of snow, he spends more time moving it than working. If we get a cold snap, the equipment doesn’t like to start. If the homeowner can afford it, the jobsite can be tented and heated, which allows work to continue.

This past week, he and the crew have been working inside. One of the buildings in downtown Kalispell is being converted to a restaurant. That building just happens to be next to our bank, so after I stopped at the bank to deposit some checks, I went to look at what the husband was doing in the basement of the building:

This building dates back to the early 1900s, when foundations were made of hand-laid stone and limestone mortar. Code requires a doorway here, so the husband had to cut through the rocks and remove them one by one. Yesterday, he and the crew poured a concrete sill and next week, they will frame a doorway.

He has been doing more and more concrete (and rock) cutting over the past couple of years. Homeowners who want to convert basements into apartments often call him to come and cut egress windows and doors in their foundations. He’s got quite a setup—all the cutting equipment lives inside a trailer that he has fitted out with pumps and large totes of water for cooling the cutting blades.

*******

We’ve been under a winter storm warning for the past 24 hours but it turned out not to be much—for us, at least. We actually got more snow on Monday when there were no alerts in the forecast. 🤷🏻‍♀️ The power did go out, which was no surprise given how much snow is still on the trees.

I finished the Kanoko tote yesterday. It turned out okay. I appreciate the process of making a pattern start to finish according to the pattern instructions, because I think it’s important to see how designers make the choices they do. I might think I know how best to construct something, but defaulting to familiar techniques doesn’t afford me the opportunity to learn anything. I am reminded of the women who would take my classes at Stitches events or other conferences and confidently swagger into the classroom announcing that there was nothing I could teach them because they had been knitting for 40 years. Most of them had been knitting exactly the same way for those 40 years.

In this case, though, I would make some changes. I am tempted to make this tote again using the Klum House waxed canvas just to see if I have an easier time of it.

I will do the top differently next time:

My travel tote has a longer zipper with zipper tabs at each end, and the zipper is free from the bag at both ends. Think the Open Wide Pouch by Noodlehead and you’ll get the picture. The bag design, above, makes a very neat and tidy opening, but it prevents adequate access to the interior. It was also a pain to sew, even on the 1541. I am not sure that someone with just a domestic machine would be able to make this bag. What I really needed was a post-bed or cylinder arm machine to do that last bit of assembly. (No, I am not going to buy one.)

Another thing I found curious was that only the high stress areas of the lining called for interfacing. I am used to making bag patterns where the entire lining is interfaced. It could be that interfacing is expensive or hard to get where the designer lives. Next time, I would interface the entire lining. I might also use a waterproof canvas or lightweight Cordura for the lining instead of quilting cotton.

I’m trying to decide if I want to go ahead with version 2.0 in Klum House waxed canvas, making it the same dimensions and style as my travel tote in order to test out the design modifications, or if I have scratched this itch for the moment and need to move on to something else. There is something to be said for continuing on while this is fresh in my mind. We’ll see.

Still With the Zippers

The pile of paperwork has been filed and the cutting table is once again clear. The construction company is a partnership (hubby and me), and the tax returns are due March 15, so I try to get all of that information to the accountant as soon after January 1 as I can.

I worked on the Kanoko Tote after lunch. Let’s talk about machines for a moment, shall we? I am not a happy sewist if my machines are not humming along in top-notch shape. My beloved Necchi industrial was out of commission for almost six months after I broke the tension stud. Thanks to a very talented machinist in Spokane, I was able to get a replacement part. I haven’t sewn a lot on that machine since I put the new part on it, but when I started this project, I spent a good 30 minutes refining both the upper and lower tensions so that they are absolutely perfect.

The Juki 1541 has a servo motor with a needle positioner. In a nutshell, that means that I can control the speed of the motor digitally. I can also tell the machine to stop sewing with the needle up or the needle down, depending on my preference. I like it to stop sewing with the needle down, in the material. The servo motor came with some incredibly awful instructions translated to English from Japanese. With help from someone on the Facebook vintage industrial sewing machine group, I managed to slow down the motor (a bit), but in the process, I somehow toggled the needle positioner and the needle has been stopping in the up position.

One of the staff at Juki Junkies—where I got the machine—posted a YouTube video about changing the speed and needle position on the 1541 servo motor. Changing the settings is actually not that difficult if you’re able to make sense of the instructions. I slowed the motor to the lowest setting of 200 rpms. That is still fast if you’re not paying attention. Believe it or not, the top speed is 8000 rpms.

Now I can sew stitch by stitch. I just have to make sure my fingers aren’t in the way. I took the finger guard off the machine because it interfered with the presser foot I like to use. I think the 1541 and I will be good friends from now on, though.

The body of the tote bag is mostly complete:

It’s not perfect; attaching that front zipper pocket to the body was an absolute pain. Some of the issue, I think, is that the waxed canvas has been in the stash for a couple of years and is pretty stiff. If I hit it with a hair dryer, it softens up; I do that when I need to turn parts of the bag inside out. The fabric cools quickly, though, and gets stiff again. I doubt I would have had so much trouble had I used the Klum House waxed canvas, which is much more supple.

I was going to sew the top zipper to the zipper facing before stopping for the day, but the instructions are very specific about the length of the zipper in relation to the zipper facing. That is to ensure that there is enough seam allowance at each side to avoid the risk of hitting the ends of the zipper with the needle. Even though I had the 14" zipper specified in the materials list, I didn’t have quite enough clearance. Shortening a metal zipper is pretty straighforward: Remove the top zipper stops and clip off the teeth one by one. I could not get the zipper stops off the zipper, though, and had to enlist the husband’s help. (He made it look easy, of course.) He clipped off three teeth on each side, I replaced the zipper stops, and now the zipper is the correct length.

After I sew the top zipper, the lining is all that is left. I think this pattern will work nicely as a basis for a travel tote, although I will need to modify the dimensions. My tote is wider and not quite as tall as this one.

Welcome to 2025

All of the heavy, wet snow has been causing intermittent power outages and fallen trees for the past 36 hours. I was on my way to town yesterday morning for an 8:30 am appointment—having left in plenty of time because I didn’t know what the roads would be like—when I encountered a line of stopped vehicles a few miles north of our house. A large tree had fallen across the road. I put on my flashers and turned off the car. I spotted Susan’s daughter up ahead of me, so I called over to her and we stood there and chatted while we waited for the fire department and a neighbor who had gone home to get a chainsaw.

Imagine the scene: Half a dozen cars with flashers on, stopped in the road, waiting. The county plow was right behind me. As we stood there talking, a couple in a pickup truck drove past the line of stopped cars. When they saw the tree down on the road, they had to back up past the line of cars they had just passed to get back to where they started.

I may have made a snarky remark to them as they were backing up, because the woman had her window rolled down.

As the wife of a first responder, that kind of behavior makes my blood boil. No one is so special that they have the right to try to drive through a scene like that. Yes, this was just a tree across the road, but if it had been an MVA, not only would they have endangered the responders, they quite possibly could have blocked an ambulance trying to get to patients.

A few minutes later, enough of the tree had been cut up that the plow was able to pull past us and push it off the road. I made it to my appointment on time.

Some people truly don’t have the sense God gave a chicken. When you see 8-10 cars (and a county plow!) stopped ahead of you on the road with their flashers on, what on earth makes you think it’s okay to drive past them? If you ask the husband, he will tell you that I get out of bed every morning naively optimistic that my fellow humans will go out in public trying to be the absolute best versions of themselves. Most days by dinner time, that faith in humanity has been beaten out of me. Yesterday, it was beaten out of me before the sun even came up. 😕

The power went out again yesterday afternoon. I was home by myself, but I was able to start the new generator with some telephone assistance from the husband. We replaced our old gas generator with a diesel one about 18 months ago. I had a cheat sheet for the old generator; the husband wrote the instructions inside the door of the new one—and I’ve had a lesson—but I wanted him to walk me through the process the first time. Fortunately, the power was only out for about 10 minutes.

I am going to finish the Kanoko tote before I start a Wool and Wax Tote, but before I can do either of those things, I have to sort paperwork. I make a large pile of paid bills and receipts during the year—because I cannot abide filing—and sort everything into its respective folders at the end. In order to motivate myself to complete this job, I put it all out on my cutting table and do not allow myself to remove anything until I am done. I did about half of the sorting yesterday afternoon. I’ll complete it today, double-check some entries in QuickBooks, and then the accountant can get started on the tax returns.

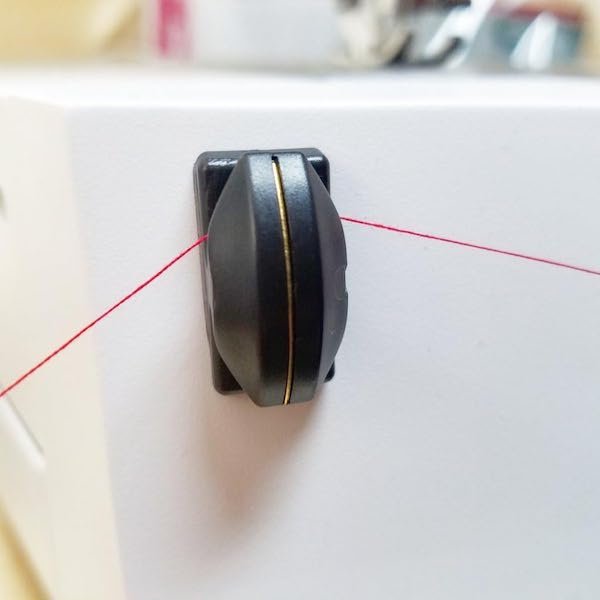
This little gadget arrived yesterday:

It’s a thread cutter to mount on the side of the Juki 1541. Jess, of the OklaRoots YouTube channel, also has a 1541 and I saw this on one of her videos. I am all for little things that make sewing more efficient.

Sewing the Kanoko Bag

Finally!—We got some snow. I took this picture yesterday morning.

As of this morning, we’ve gotten a total of about 10" of snow. The husband spent much of yesterday moving it around. He was able to fix the Blazer, by the way. He described the repair to me as a “five-cent part,” but he was able to figure out where that five-cent part belonged, and that was the crucial part.

I started work on the Kanoko tote. I’ve said before that “potato chip” sewing has its place—when I need a top to wear to church on Sunday and can knock one out on Saturday afternoon—but there is much to be said for a project that takes several days. I started the Kanoko tote with no expectation of getting to a certain point, and that makes all the difference in these big projects. I am enjoying the journey.

If I end up using this pattern to recreate my travel tote, I will incorporate some modifications, but I am making this version according to the pattern. This is one side of the tote, which has a small slip pocket:

Those are my two favorite marking tools for waxed canvas. Robin got me that fabulous point turner, which does double duty as a Hera marker. The tracing wheel is great for transferring marks from the pattern pieces.

And this is the other side, which has a flap pocket and a zipper pocket. I completed the zipper pocket but had not yet sewn it to the bag:

That area on the left side of the flap where it looks like a pleat is a trick of the light.

I’m not crazy about these 3-D pockets; they were not easy to do in this stiff waxed canvas. I was sewing on the Necchi industrial. I probably should have gone out to sew them on the Juki 1541, but it’s in the garage and I didn’t feel like hiking back and forth through the snow.

[The best outside pockets I’ve ever seen on a bag were on Betz White’s Ravenwood Messenger Bag.]

If I could have the perfect canvas for bags, it would be a bit heavier than the Klum House waxed canvas but with the same beeswax finish as the AL Frances Textiles canvas. Klum House uses a proprietary vegan blend on their canvas which is based in mineral oil. The finish tends to be a lot “wetter” than the beeswax, but the weight of the fabric is easier to sew. When I start to get into multiple layers with this bag, I will have to use the Juki 1541.

My travel bag has a large (flat) zipper pocket on one side and a trolley sleeve on the other, and those are the features I will incorporate if I make another one.

That’s as far as I got with my sewing yesterday. I don’t know if I’ll work on the Kanoko tomorrow—today is a running-around day—or if I will take a slight detour and make a Wool and Wax Tote. I have enough of that gray canvas left for the base of a W/W Tote AND it just happens to coordinate beautifully with the wool fabric I used for the coat I made in October. I am itching to make a version of the tote using the wool for the body and the waxed canvas for the base. I may have to interface the wool, but I think it will work nicely. Anna often uses Pendleton wools in her bag designs.

While all of this was going on, DD#1 and her husband were flying back to Ketchikan (from Hawaii) and DD#2’s poor boyfriend was having an emergency appendectomy. As of last night, he was doing well, but I know that wasn’t on his bingo card for 2024. I spent much of the day listening to the scanner and getting Snoqualmie Pass alerts on my phone. Some people vastly overestimate their winter driving skills. The dash cam I ordered for the Jeep arrived yesterday, although I don’t know if I’ll be able to install it before I head to town this morning.

Revisiting the Scout Tee

I love that the quilt store where I teach is willing to bring in garment fabrics. That can be a risk for a store when inventory doesn’t sell. The store recently began stocking a few colors of the Robert Kaufman Brussels Washer Linen, which is a linen/rayon blend. I had a request for a class on making a top using that fabric. I’ve sewn with it previously—I made the Emerald Dress pattern by Made by Rae out of some turquoise blue BWL—so I am not unfamiliar with it. I brought home a couple of yards.

The trick for garment classes is finding a pattern that is stylish, but not so complicated that it can’t be made in a few hours. Boxy top patterns are easy; however, they aren’t flattering to most women. I flipped through my pattern stash yesterday morning and spotted the Scout Tee from Grainline Studios. Eh—my first experience with that pattern was not so good. The one I made ended up looking like a maternity top. However, that attempt was made before I knew that I had to lengthen patterns for myself, or knew to check the height of the fit model used by the pattern company for drafting.

I decided to re-trace the pattern, adding 2" to the length by slashing and spreading the pattern vertically just under the bust. That pattern does come with cup sizes. I had previously traced the D-cup version for my size and knew that the darts were in the correct location.

The Scout Tee is not a difficult pattern. I finished raw edges on the serger but sewed the seams on the 880. The neckline was finished with bias tape and the sleeves and bottom edge got narrow hems. I am going to tinker with the armscye a bit because it feels a bit too high and tight to me. I wonder if that is a function of grading out to a D cup in the pattern; in order to make that work and keep the armscye from gaping, the base of the armscye rotates up and back quite a bit. I think it’s easy to overdo that and make the armscye too tight. The other possibility is that the pattern needs a broad back adjustment, which I’ve had to make in other patterns. Or both.

It looks like a shapeless sack on the dress form because the dress form torso is shorter than I am and also not as well endowed. Save for the sleeves, I like the way the Scout Tee fits on me now that it has been lengthened. I’d like to try it in one of the batik rayons in my stash.

I tried a new trick for setting in the sleeves and it worked better than any other method I’ve tried thus far, although I still see room for improvement. I used the gathering foot on my 880 to gather the head of the sleeve before setting it into the armhole. That trick came courtesy of a Bernina of Naperville video. (That channel is fabulous.) And yes, I’ve tried everything including sewing with the sleeve against the feed dogs to help ease in the cap. With almost every pattern I’ve made, I’ve only truly been happy with the sleeves after I’ve shaved a bit of height off the cap. 🤷🏻‍♀️

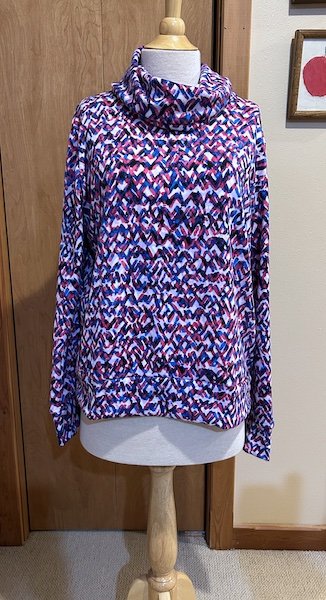
After lunch, I knocked out another Simplicity 9385, this time in the squiggle print:

(I apologize for the dress form—the base is loose and the whole form keeps listing to one side. The husband tried to fix it for me. It’s better than it was.)

I’ve had two days of very productive sewing. The husband spent yesterday out in the shop working on the Blazer. He is like a dog with a bone; he isn’t going to let that project go until he chases down the problem and fixes it. I know he likes a challenge.
I don’t need to go to town again until Tuesday, so tomorrow will be devoted to working on that Kanoko tote.